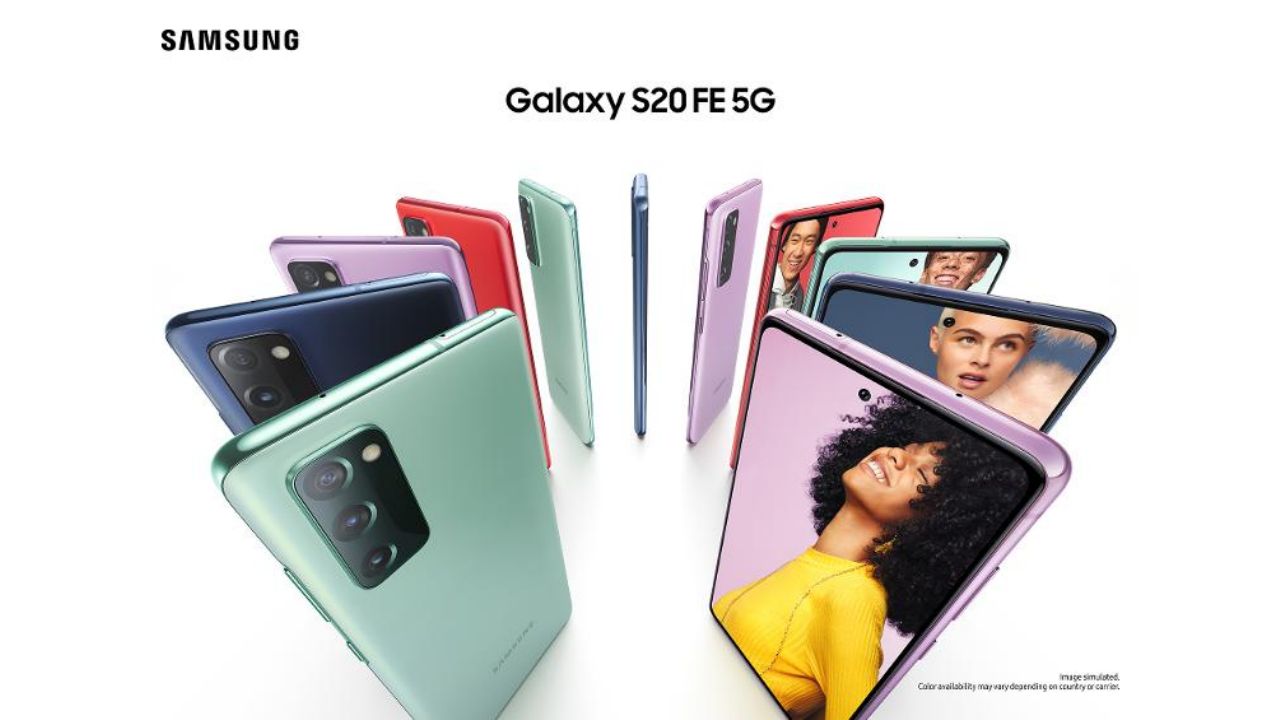
Samsung always surprises us with its innovations regarding technology; in today’s market, it holds the largest share in terms of shipments, and it’s worth appreciating that the company is properly managed to give proper attention to its smartphones in terms of software updates. Currently, the company is rolling out the latest One UI 5.1 update for its eligible Galaxy devices, which is the second major update after One UI 5. And it brings One UI 5.1 Camera hidden feature.
The latest One UI 5.1 has brought several significant features which are quite interesting to use and make the device handier; all the features come under several pre-existing apps like camera, Gallery, AR Zone, and many more to get an idea about the feature and click here. With the latest One UI 5.1, Samsung has added some minor changes that were not revealed in the official changelog of the Samsung; some features in the camera app have been introduced; let’s discuss them.
Check out the Samsung One UI 5.1 Hidden Features, Tips, and more
One UI 5.1 Camera Hidden Features
After installing the One UI 5.1 on your Galaxy smartphone, you will get some new features in your stock camera app.
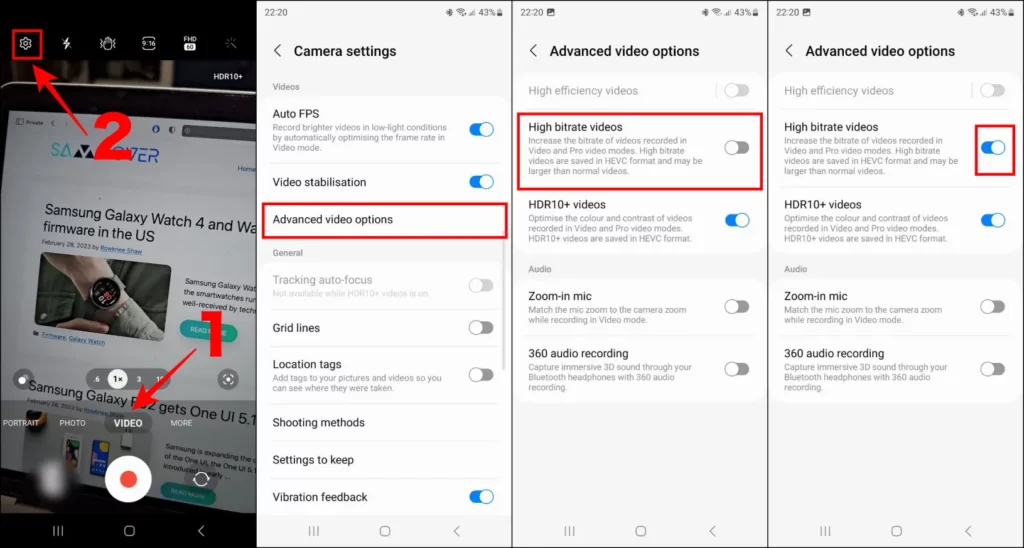
1. High Bitrate Videos
High bitrate video option will help you to increase the bitrate of videos that are recorded in video and Pro video mode. Ultimately it will increase the quality of the video. It is also worth noticing that the recorded videos will be saved in HEVC format and will be larger as compared to normal videos.
How to access it:
To access it, you first have to open the video mode in the camera app, then click on the setting icon. Now go to the Advanced menu option. Here you will see the second op[tion as “High bitrate videos” turn on the toggle, and you will easily get high-quality videos; to turn it off, you have to follow the same process.

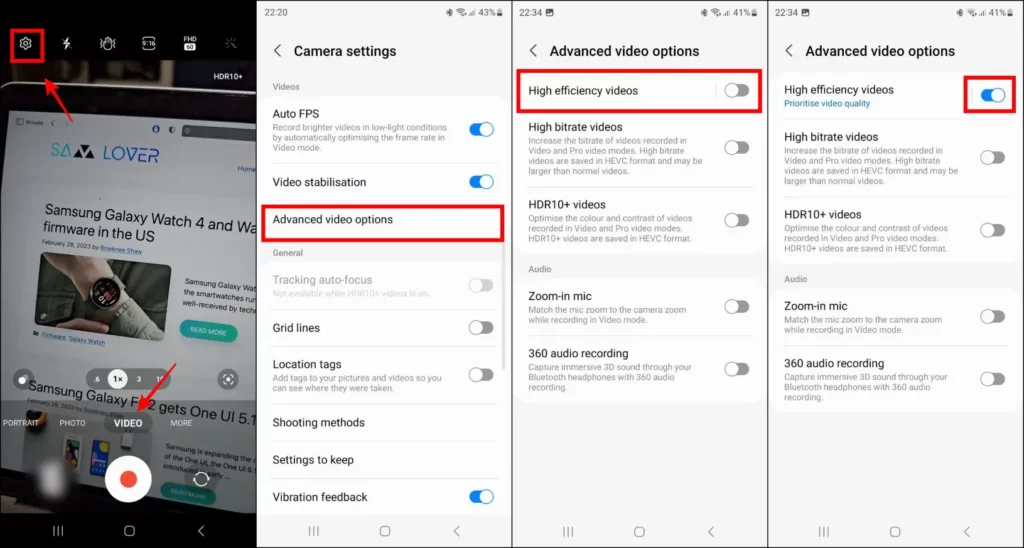
2. High-Efficiency Videos
High-efficiency videos option works just opposite to the previous option. It reduces the file size of the video and saves the video in HEVC format; in this option, you will get two more options – Prioritise video Quality and Prioritise saving space; if you select the first option, it will prioritize video quality to capture more fine details, while if you select to prioritize the space.
How to access it:
To access the option, first, you have to go on the video mode, then click on the settings icon in the top left corner, then click on Advanced Videos options, now here you will get the “High-efficiency videos”; just turn it on and enjoy recording video in less size.
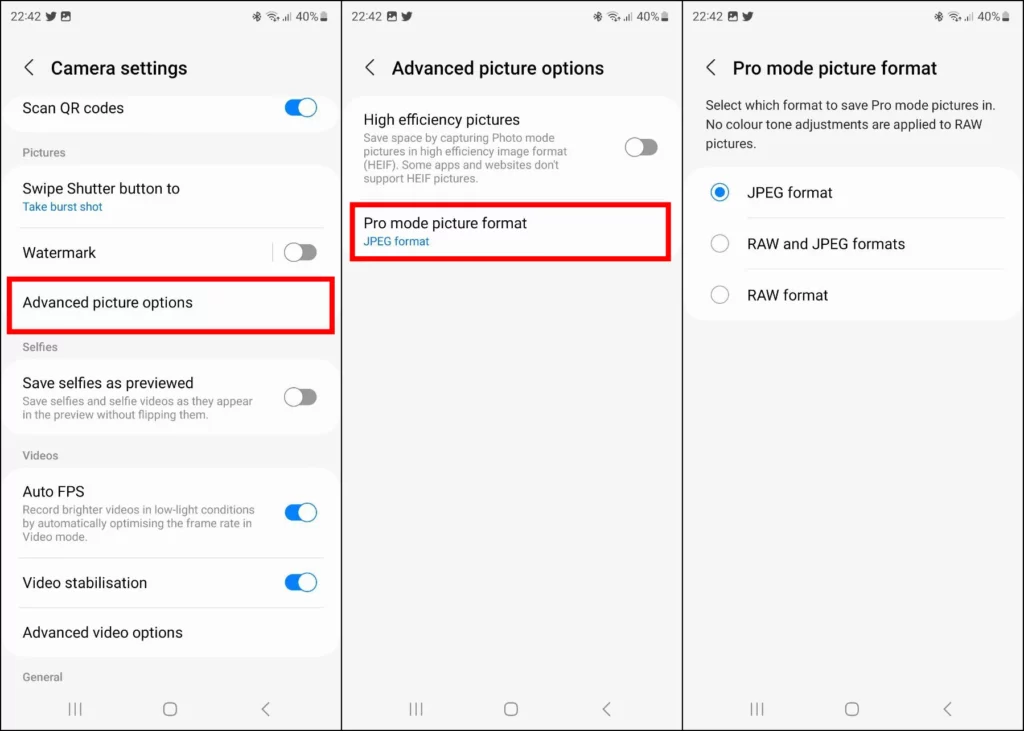
3. Change The Picture Format Of Pro Mode
Now, you can change the picture format of pictures that are taken in Pro mode; it provides three different formats, as- JPEG format, RAW format, and “RAW and JPEG formats.”
How to access:
In the camera app, tap on the settings icon, which is available top left of the screen ( just make sure you are not in video mode); now in the settings menu, go to the Advance picture option, now tap on pro mode picture format, here you will see three option containing different just tap on any one which you want to save the video.

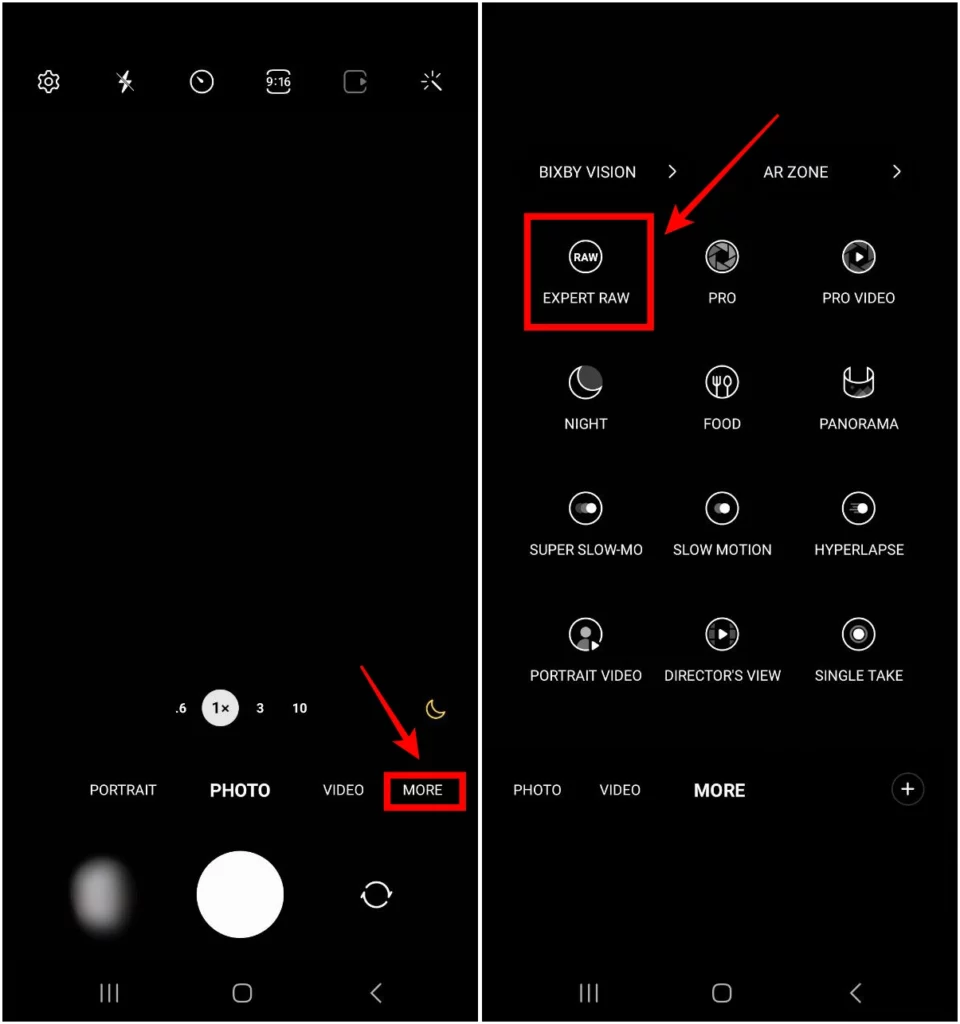
4. Quickly Access The Expert RAW App
With the latest One UI 5.1, you can be able to access the Expert RAW app by the camera app directly, for starters the Expert RAW app is a camera-based app that provides various functions which enhance the photography experience of the device. It lets you switch different lenses easily and pretty similar functions as a pro mode with user-friendly UI.
How to access:
It is very accessible from the camera; you just have to click on the “More” option, which is available in the strip menu; just swipe left, and you will get the more option; now click on it, and here you will get several options which first one is Expert RAW just tap on it and enjoy shooting best quality photos.

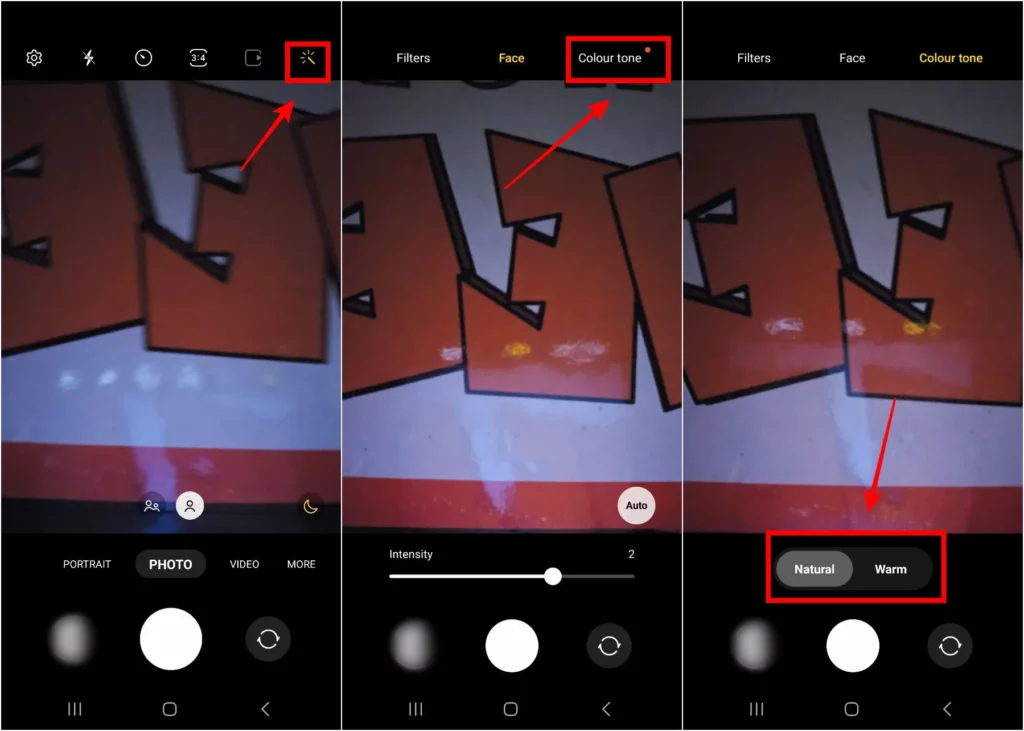
4. Change Selfie Color Tone
One UI 5.1 gives you the ability to choose the color tone of your selfie. Now, when you snap a photo, you have the option to set the color tone between a natural or warm tone, depending on your preference. This feature allows you to capture the perfect lighting and color balance, resulting in a picture-perfect selfie every time.
How to access:
If you want to change selfie color tone, Open the camera app, now turn on selfie mode. And tap on the filter icon on the top right corner. Now tab to colour tone option. In the bottom you have to tow options – Natural or Warm.
Keep in Mind: It’s important to note that not all devices may be able to support certain features due to hardware limitations. This means that users may not be able to access certain functionalities, depending on the specific device they own. However, most high-end Galaxy devices should be able to support these features easily. If you’re unsure about whether your device can support a particular feature, it’s always a good idea to check the device specifications.