Guide
One UI 5.1 Battery Widgets Customization: Reorder, Transparency, and more: How to use?
Samsung offers several features with the One UI update; most are designed to give more comfort while using their devices. Like Google provides new functionalities through every new Android version, the Korean giant also adds some extra features attached to One UI that comes with the latest Android.
The New battery widget is also one of those features which are exclusively available for Galaxy devices, users who update their to One UI 5.1, as the update is not available for every Samsung phone, so you can check whether your device is eligible for the update or not. Now let’s know about the battery widget before talking about how to use it.
One UI 5.1 New Battery Widget
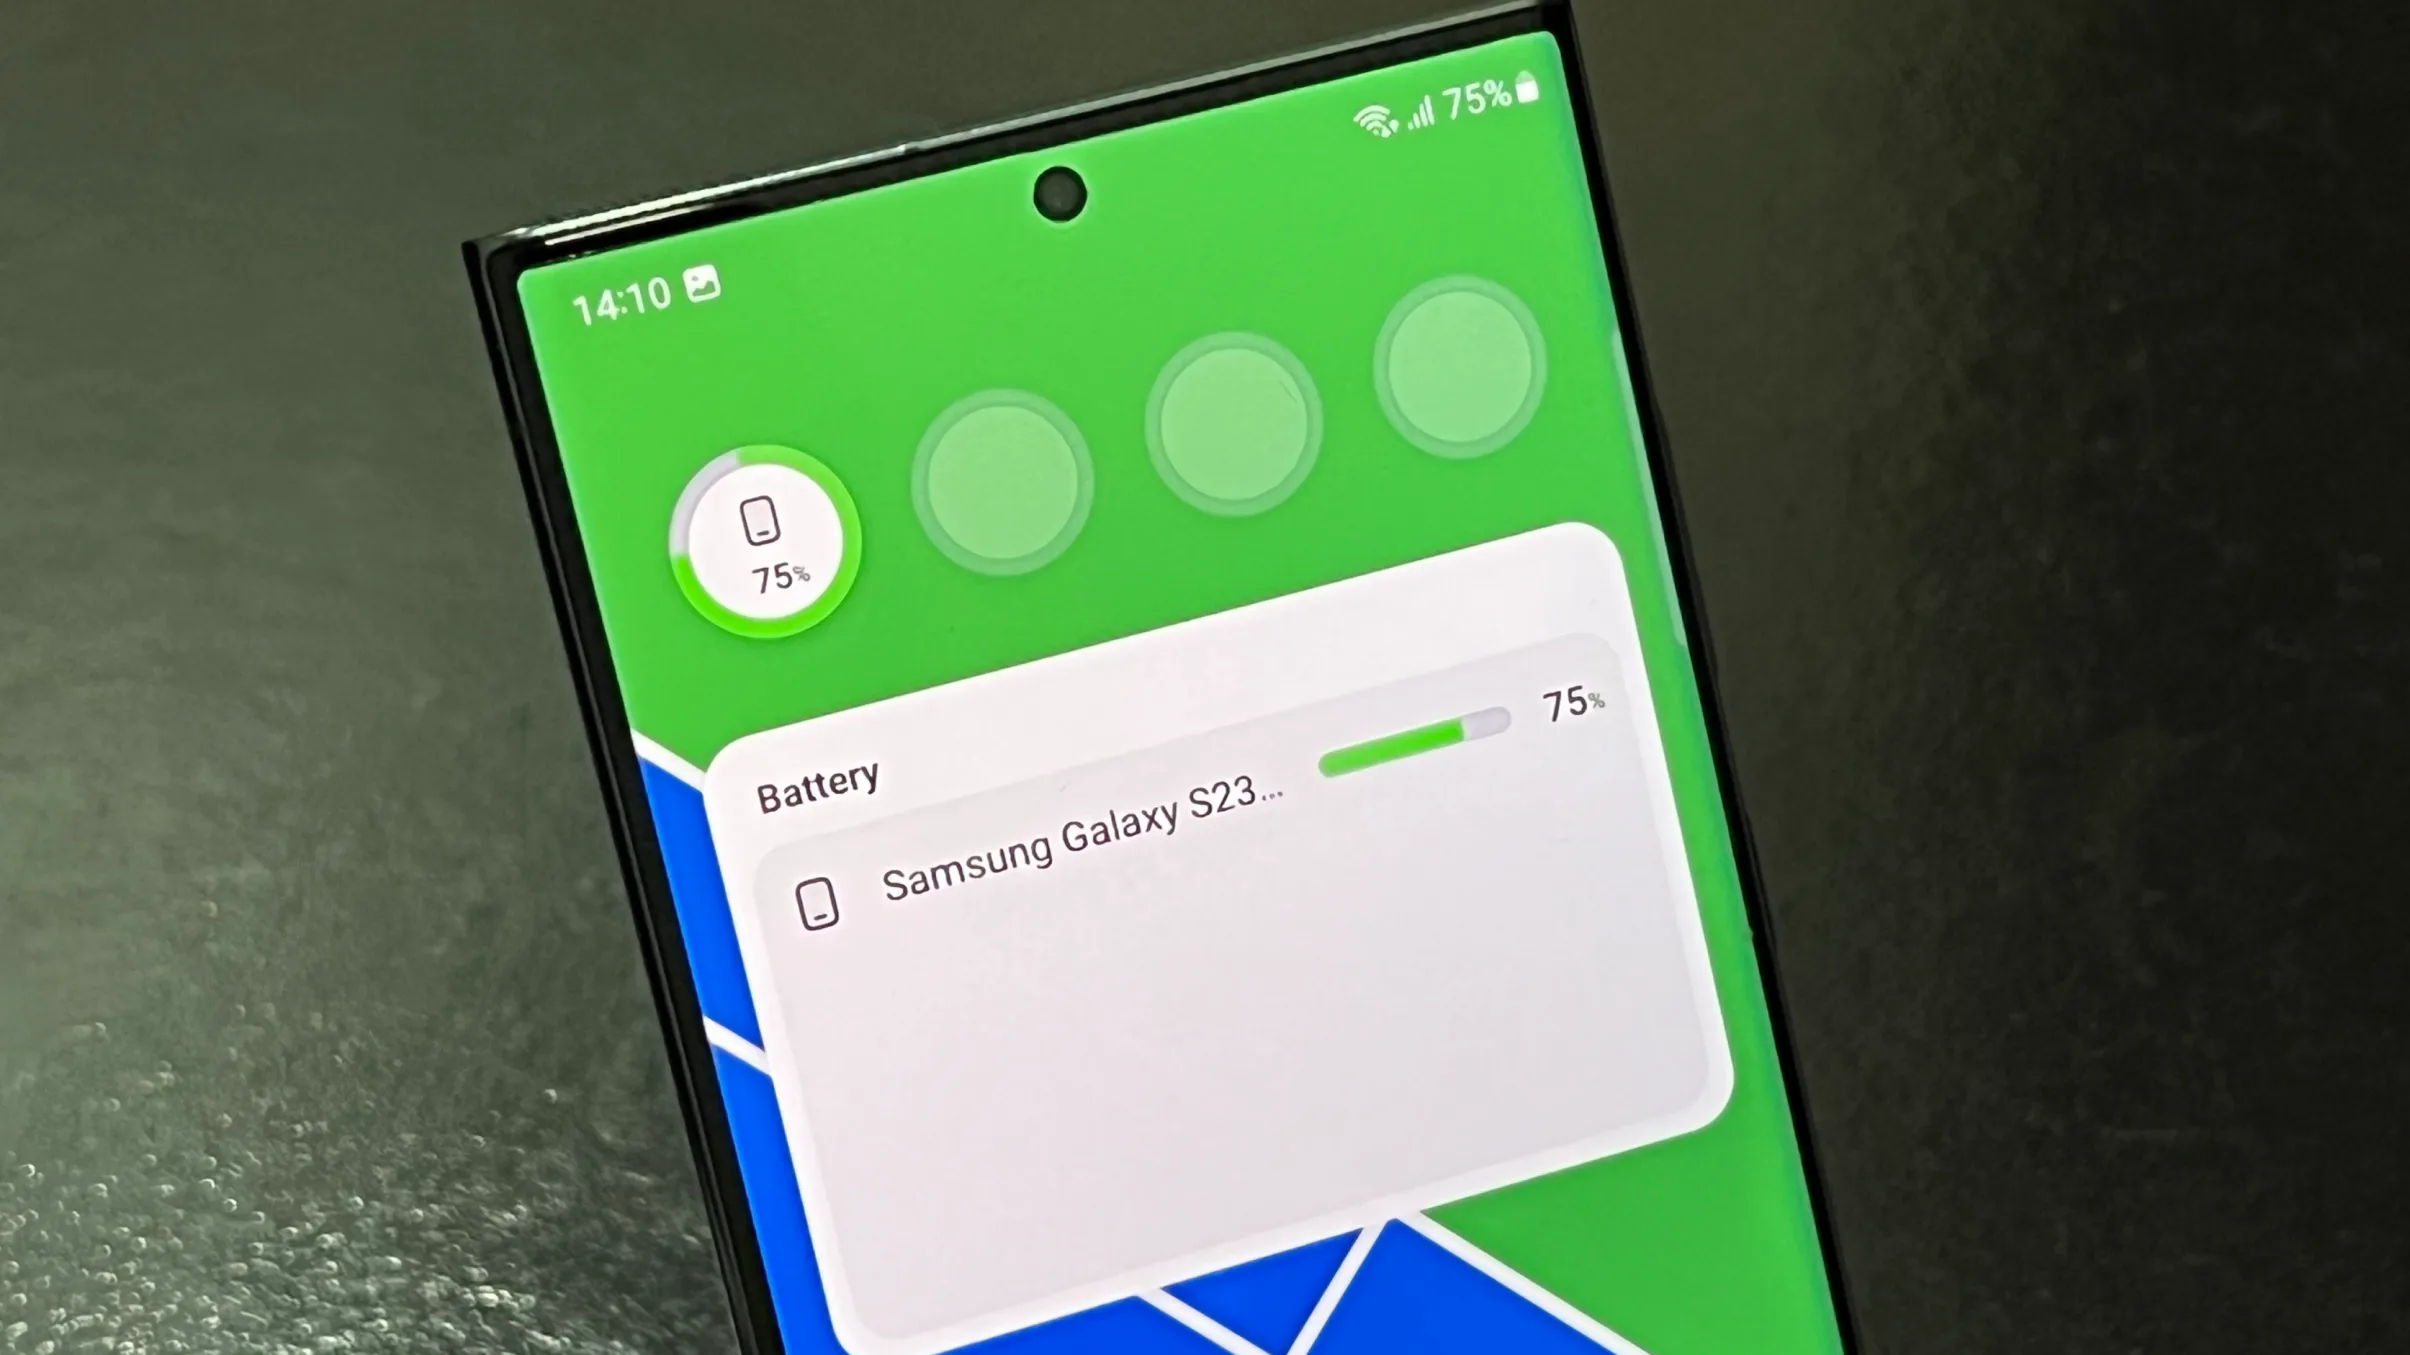
As said earlier, the Battery widget is a new type of widget that Samsung introduced in Galaxy devices in the One UI 5.1 update. It is very useful for those users who use several devices at a time and connect to their smartphones. With the help of a battery widget, it is easy to identify how much Battery is left in each device. It shows the real-time battery percentage of each device on the home screen. Informatively it will show the battery indications of the smartphone, Galaxy Watch, Galaxy buds, and S-Pen side by side on a single line with icons.
Here’s how you can add a Battery Widget to your Galaxy smartphone
You can easily add the battery widget to your home screen; just follow the given steps:
- On the Home Screen – Long-press on an empty space on your until the options menu appears.
- Tap on “Widgets” from the options at bottom.
- Scroll down until you find the “Battery” widget and tap on it.
- Drag the battery widget to a location on your home screen.
- Release your finger to place the widget on your home screen.
How to customize new One UI 5.1 Battery widgets and Reorder and transparency
There are several customizations available for battery widgets so users can easily keep it on the screen according to their choice.
Set Widgets Icons Transparency
- By just tapping and holding the battery widget;
- Tap on the gear icon it will take you to the settings menu;
- Different options like “Device to show,” “Background color,” and Match with dark mode;
- There, you will also get a slider; you can use this slider to make your widget transparent. If you slide left, it will make the widget transparent, and if you increase it will opaque it.
Reorder Widgets Icon
- Go to the home screen of your Samsung Galaxy smartphone.
- Press and hold the battery widget icon for a few seconds until the screen changes and you can see a popup menu.
- Go into ‘Settings’ option;
- Now tap on ‘Device to show’;
- On top right corner ‘Reorder’ option, click on it;
- While holding the widget icon, drag it to the desired location;
- Release the widget icon in the desired location.
Guide
Samsung One UI: How to Enable Swipe-Down Search On Galaxy Phone’s Home Screen
Nowadays, every smartphone user generally uses hundreds of applications on their devices, and due to the large number of applications, it’s a bit difficult to find the desired application, so to make it simple, users have only one solution: manually search for the application with its name using the finder option.
Samsung Swipe Down To Access App Finder
Samsung has rolled out a new update for the Home Up application. With the latest update, users have received some useful features; Finder Access is one of them, which has made app access more convenient. It allows users to quickly jump to the app finder with one swipe. Let’s understand how you can use it.
How to Enable Samsung Home Screen App Finder with Good Lock Home Up
To use the App Finder, your Samsung Galaxy phone should support the Good Lock application and then you need to update the Home Up application to the latest version (v15.0.01.19), then follow the below steps:
- Go to the Good lock.
- Here, select the Home Up module.
- Turn on the Home Up
- Then tap on the Home screen option.
- Here, you will get the Finder access option, then tap on it.
- Now choose any option from the “Home screen” or “App screen” where the feature should be activated.
- Now if you swipe down on the Home Screen to access App Finder.
Note: The latest update for Home Up is only available for Galaxy devices that are running on One UI 6.1 or above. And Swipe Down control centre won’t work after enable this feature.
Guide
Galaxy AI: How to Summarize & Transcribe Voice Recording into Text on Samsung Phone
Samsung has recently rolled out the One UI 6.1 update for several Galaxy devices. With the late One UI update, the company has brought several innovations that will provide several utility options for the users. From several features, the AI power ones are the most highlighted, and voice record summarization is also a unique feature.
What is voice recording summarization?
Now, with the One UI 6.1 update, Galaxy users can easily transcribe any voice recording into text form and summarize it in their own language. This will help users easily make notes according to what is recorded.
To use this feature, you need to go to the settings and then select the Advanced feature. Here you will see the voice recorder, tap on it, and then touch the summaries option. Now turn it on. When it is turned on, you can enjoy summarizing voice recordings.
To summarize the voice recording Go to the recorder application, select the desired recording file, and here you will see the option ‘transcribe’. Once it finishes transcribing, you will see one more tab for summarization. However, the option is currently not working correctly as it fails to detect the exact wording of other languages except English. However, it is expected that the company may bring more optimization to the device to make the feature more powerful.
How to Transcribe Voice Recording into Text on Samsung Phones
If you are using a Galaxy device that has installed the One UI 6.1 update, then you can easily use voice recorder summarization by following these steps:
- Go to the Settings and select the advanced feature.
- Here you will see a voice recorder option. Tap on it to access
- Now turn the toggle on to activate it.
- Once activated, open the voice recorder, then select any saved file.
- Now you will see the option “transcribe.” It will provide all the information from the test.
- Once the transcription is done, you will get a summarize tab adjacent to it; just swipe write to access it.
Guide
Samsung One UI: How to Manage Always-on Display (AOD) Brightness after One UI 6.1
Samsung has introduced some new utilities with One UI 6.1 for the AOD display. Users who own the Galaxy S24 can put wallpaper in the Always on display and add some widgets as well; however, the company has removed the manual brightness settings for the same feature. But you don’t have to worry, as you can still manage the always-on-display brightness with new methods.
How to manage AOD brightness for Galaxy S24 series
With the latest One UI 6.1, Samsung has removed the manual brightness settings for the Galaxy S24 devices. If you want to adjust the auto brightness, you have to set the preferred brightness level of the main display from the notification panel. The reason behind the removal of the feature is to give convenience to users, as it brings automation for brightness by default, so it will dim or increase the brightness of the AOD according to the light condition.
How to Manage AOD Brightness after One UI 6.1 update
Apart from Galaxy S24 devices, Samsung has placed the AOD manual control option in the Good Lock – LockStar App settings, so if you want to take advantage of the manual control settings, first you need to update the Lockstar application to the latest version, then follow the below steps:
- Open the Good Lock on your device’
- Then tap on the LockStar module from the list of “Makeup” modules.
- Here you will see the option Always On Display Auto Brightness.
- If you don’t see the manual brightness control, then turn the auto brightness off.
- Then you will get a dedicated slider so you can set the brightness to a different level.