
Guide
Samsung One UI: How to Enable Swipe-Down Search On Galaxy Phone’s Home Screen

Nowadays, every smartphone user generally uses hundreds of applications on their devices, and due to the large number of applications, it’s a bit difficult to find the desired application, so to make it simple, users have only one solution: manually search for the application with its name using the finder option.
Samsung Swipe Down To Access App Finder
Samsung has rolled out a new update for the Home Up application. With the latest update, users have received some useful features; Finder Access is one of them, which has made app access more convenient. It allows users to quickly jump to the app finder with one swipe. Let’s understand how you can use it.
How to Enable Samsung Home Screen App Finder with Good Lock Home Up
To use the App Finder, your Samsung Galaxy phone should support the Good Lock application and then you need to update the Home Up application to the latest version (v15.0.01.19), then follow the below steps:
- Go to the Good lock.
- Here, select the Home Up module.
- Turn on the Home Up
- Then tap on the Home screen option.
- Here, you will get the Finder access option, then tap on it.
- Now choose any option from the “Home screen” or “App screen” where the feature should be activated.
- Now if you swipe down on the Home Screen to access App Finder.

Note: The latest update for Home Up is only available for Galaxy devices that are running on One UI 6.1 or above. And Swipe Down control centre won’t work after enable this feature.


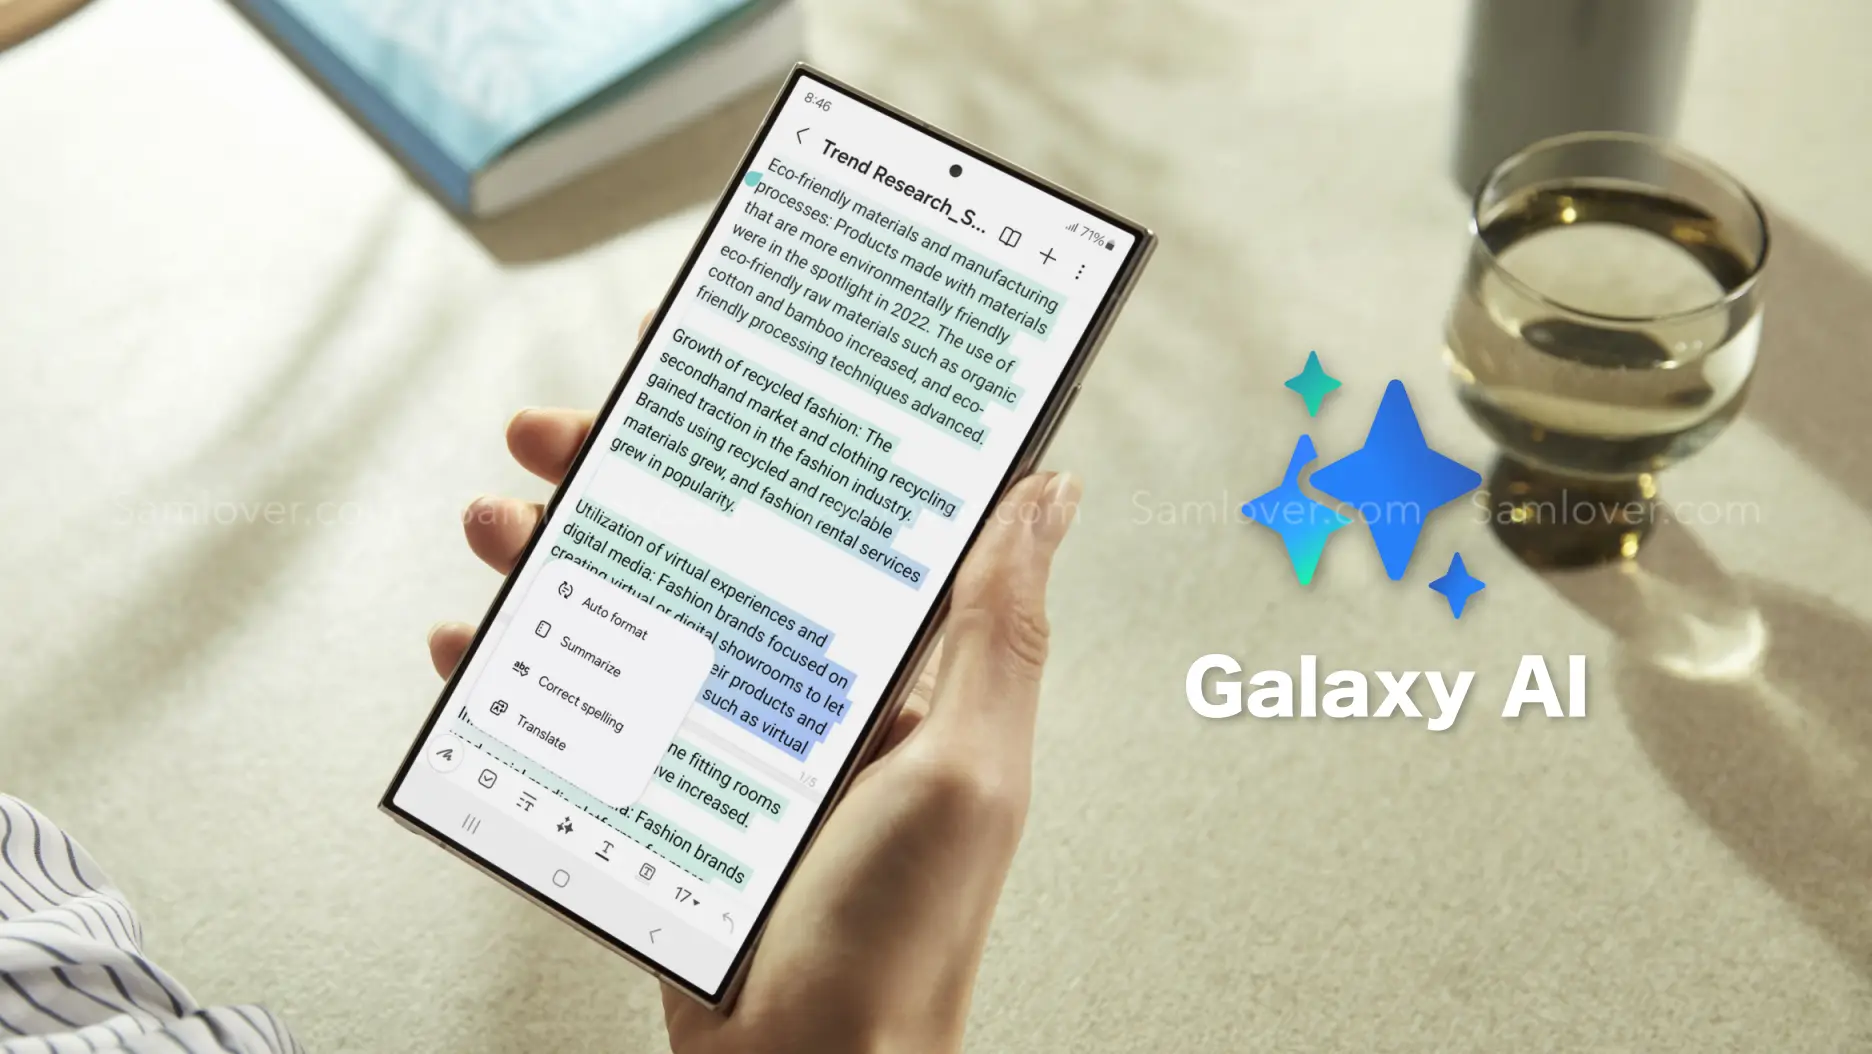
If you like to read articles on the internet, you will love the Galaxy AI summarization feature, which will help you quickly read the main concept of the article and also take advantage of on-demand translation of the content into your language.
Initially, it looks like the feature may be available for all the browsers installed on Galaxy devices, but while exploring the feature, we got to know that you can take advantage of the summarization and translation abilities only from the Samsung Internet browser. Let’s learn about how to use the feature.
Galaxy AI Summarize and Translate Feature on Samsung Internet Browser
The summarization and translation of web pages work as an assistant, which works on demand from users, so it suits the browsing assist function. When it arrived, it looked like a premium feature, so there were some rumors that it might be limited to the Galaxy S24 devices, but with the latest development, the expansion of One UI 6.1, the feature was spotted on all the flagship devices released last year.
How to use Galaxy AI Summarize and Translate feature
- First, open the Samsung Internet browser.
- then search for whatever you want to read. When the page loads, tap on the star icon (Galaxy AI icon) in the center of the toolbar.
- Now, pick one of two options. either summarize or translate and wait until it processes. If you want to take a more detailed summary, then you can select the Detailed option, or for a shorter summary, you can go for Standard.
- After the summary, you can also translate the content into the desired language by tapping on the translate button.
It is worth noticing that the browsing assist doesn’t work on all the sites because some sites use paywalls that don’t give access to the AI. However, once you subscribe to the particular site, you can easily do the translation and summarization.
Samsung has recently rolled out the One UI 6.1 update for several Galaxy devices. With the late One UI update, the company has brought several innovations that will provide several utility options for the users. From several features, the AI power ones are the most highlighted, and voice record summarization is also a unique feature.
What is voice recording summarization?
Now, with the One UI 6.1 update, Galaxy users can easily transcribe any voice recording into text form and summarize it in their own language. This will help users easily make notes according to what is recorded.
To use this feature, you need to go to the settings and then select the Advanced feature. Here you will see the voice recorder, tap on it, and then touch the summaries option. Now turn it on. When it is turned on, you can enjoy summarizing voice recordings.
To summarize the voice recording Go to the recorder application, select the desired recording file, and here you will see the option ‘transcribe’. Once it finishes transcribing, you will see one more tab for summarization. However, the option is currently not working correctly as it fails to detect the exact wording of other languages except English. However, it is expected that the company may bring more optimization to the device to make the feature more powerful.
How to Transcribe Voice Recording into Text on Samsung Phones
If you are using a Galaxy device that has installed the One UI 6.1 update, then you can easily use voice recorder summarization by following these steps:
- Go to the Settings and select the advanced feature.
- Here you will see a voice recorder option. Tap on it to access
- Now turn the toggle on to activate it.
- Once activated, open the voice recorder, then select any saved file.
- Now you will see the option “transcribe.” It will provide all the information from the test.
- Once the transcription is done, you will get a summarize tab adjacent to it; just swipe write to access it.
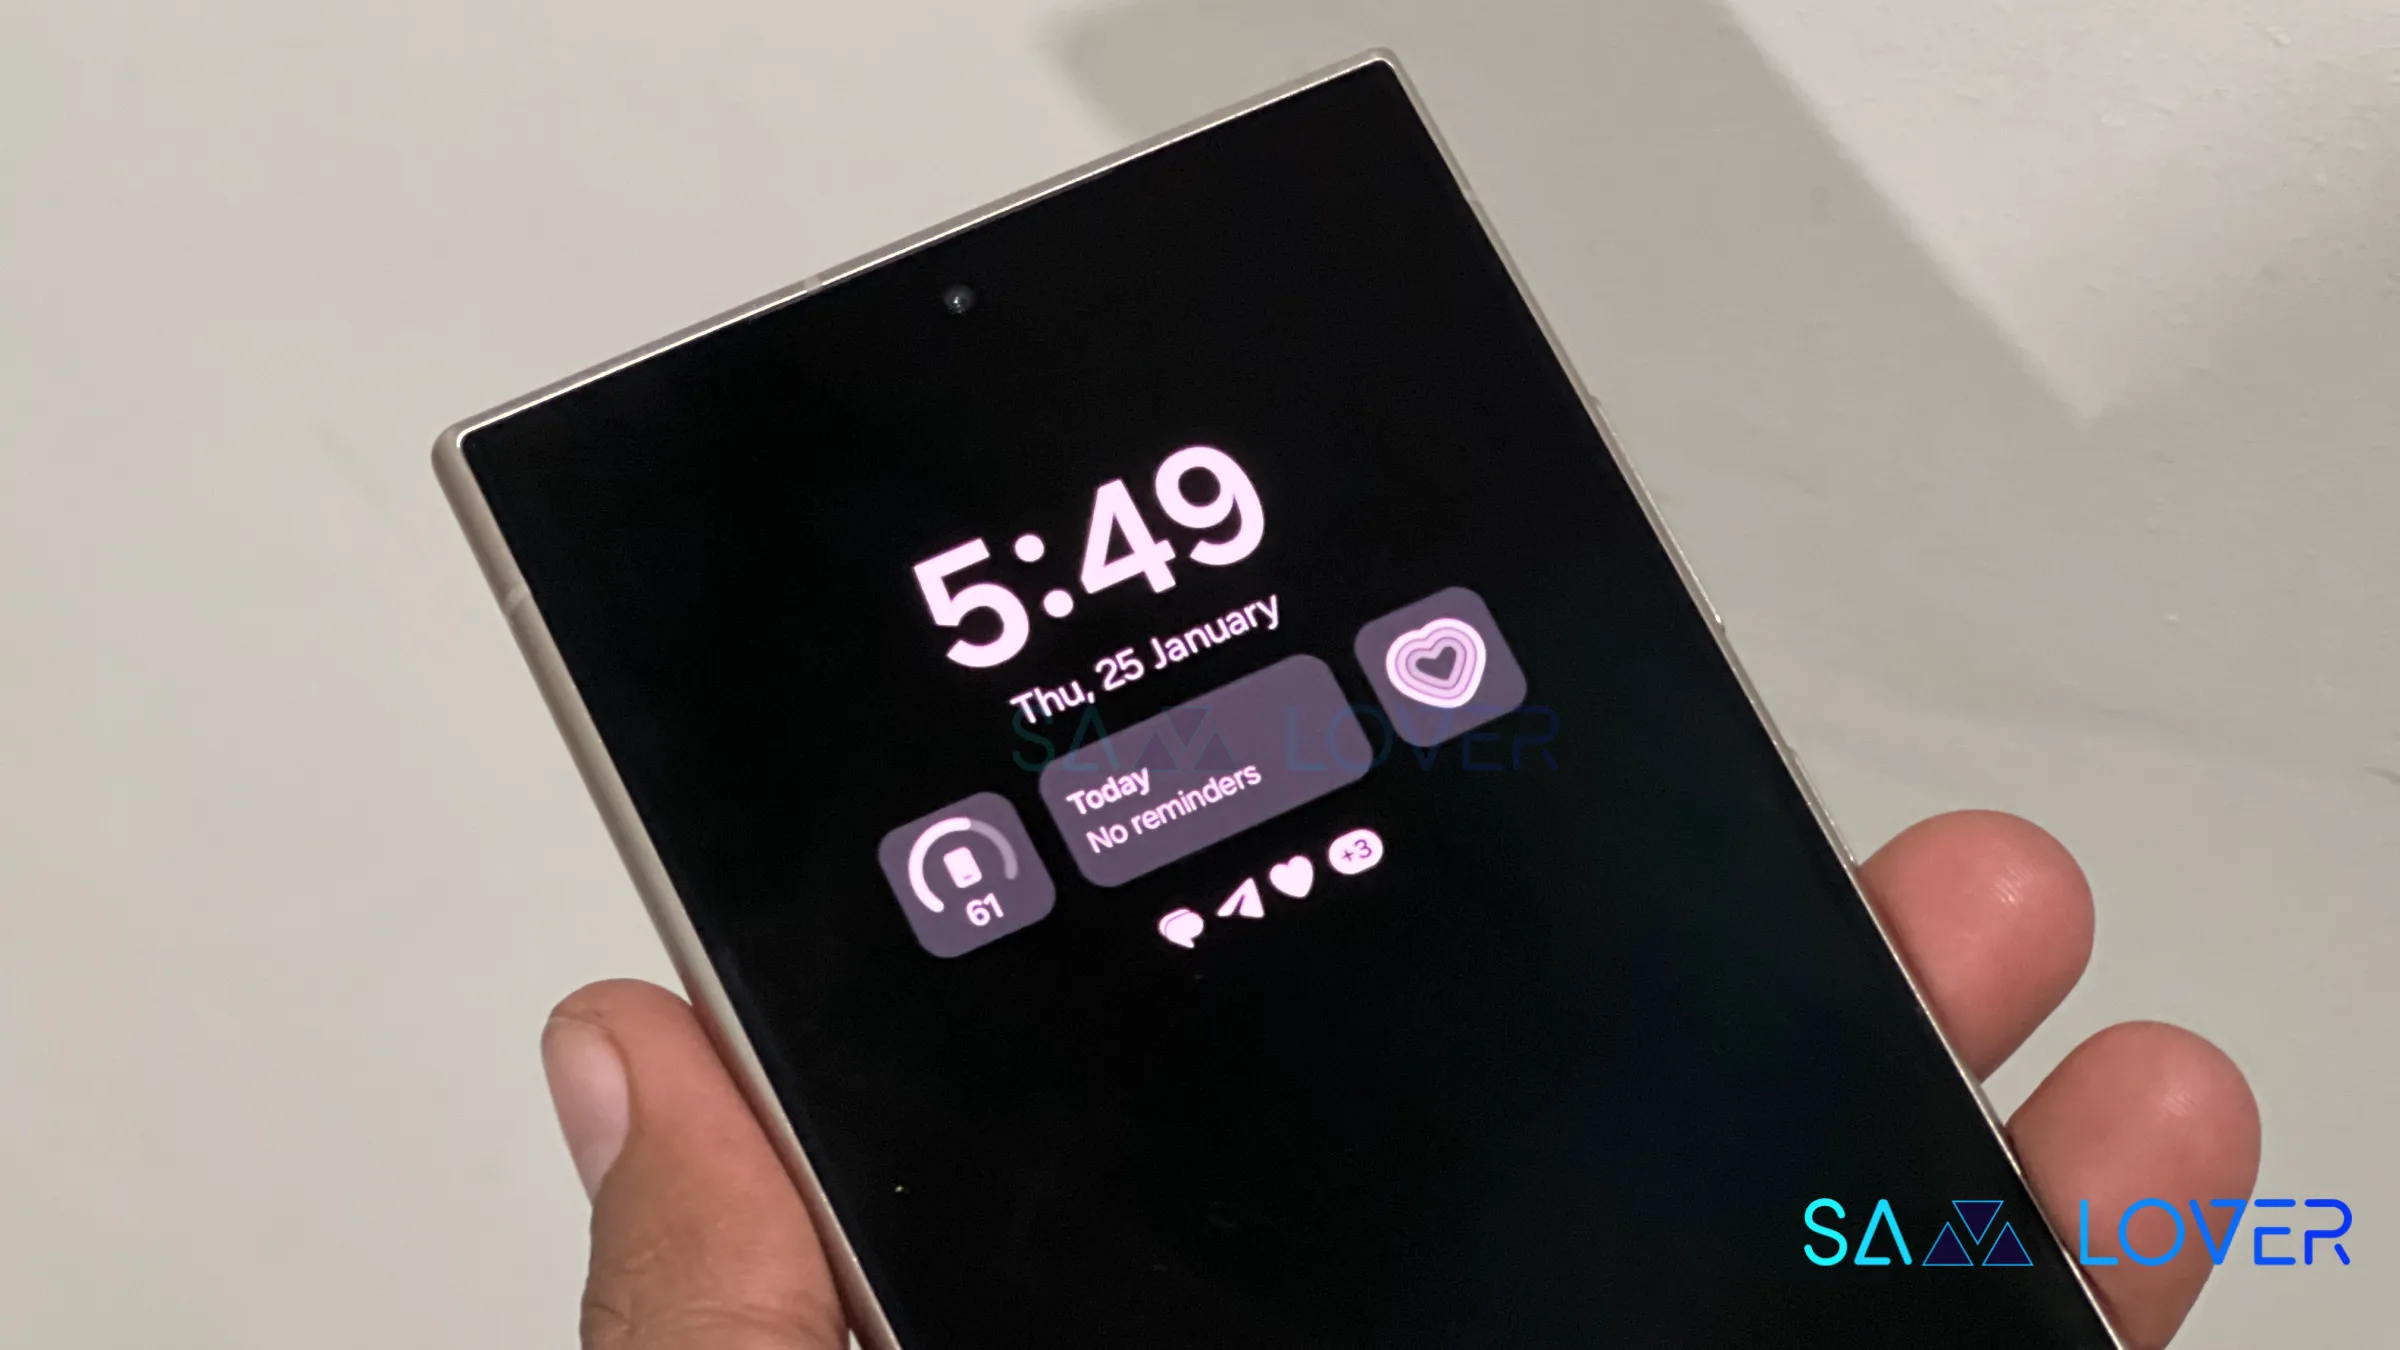
Samsung has introduced some new utilities with One UI 6.1 for the AOD display. Users who own the Galaxy S24 can put wallpaper in the Always on display and add some widgets as well; however, the company has removed the manual brightness settings for the same feature. But you don’t have to worry, as you can still manage the always-on-display brightness with new methods.
How to manage AOD brightness for Galaxy S24 series
With the latest One UI 6.1, Samsung has removed the manual brightness settings for the Galaxy S24 devices. If you want to adjust the auto brightness, you have to set the preferred brightness level of the main display from the notification panel. The reason behind the removal of the feature is to give convenience to users, as it brings automation for brightness by default, so it will dim or increase the brightness of the AOD according to the light condition.

How to Manage AOD Brightness after One UI 6.1 update
Apart from Galaxy S24 devices, Samsung has placed the AOD manual control option in the Good Lock – LockStar App settings, so if you want to take advantage of the manual control settings, first you need to update the Lockstar application to the latest version, then follow the below steps:
- Open the Good Lock on your device’
- Then tap on the LockStar module from the list of “Makeup” modules.
- Here you will see the option Always On Display Auto Brightness.
- If you don’t see the manual brightness control, then turn the auto brightness off.
- Then you will get a dedicated slider so you can set the brightness to a different level.
