Connect with us

Guide

How To Use Multi Window On Galaxy Z Fold 4

Published

on


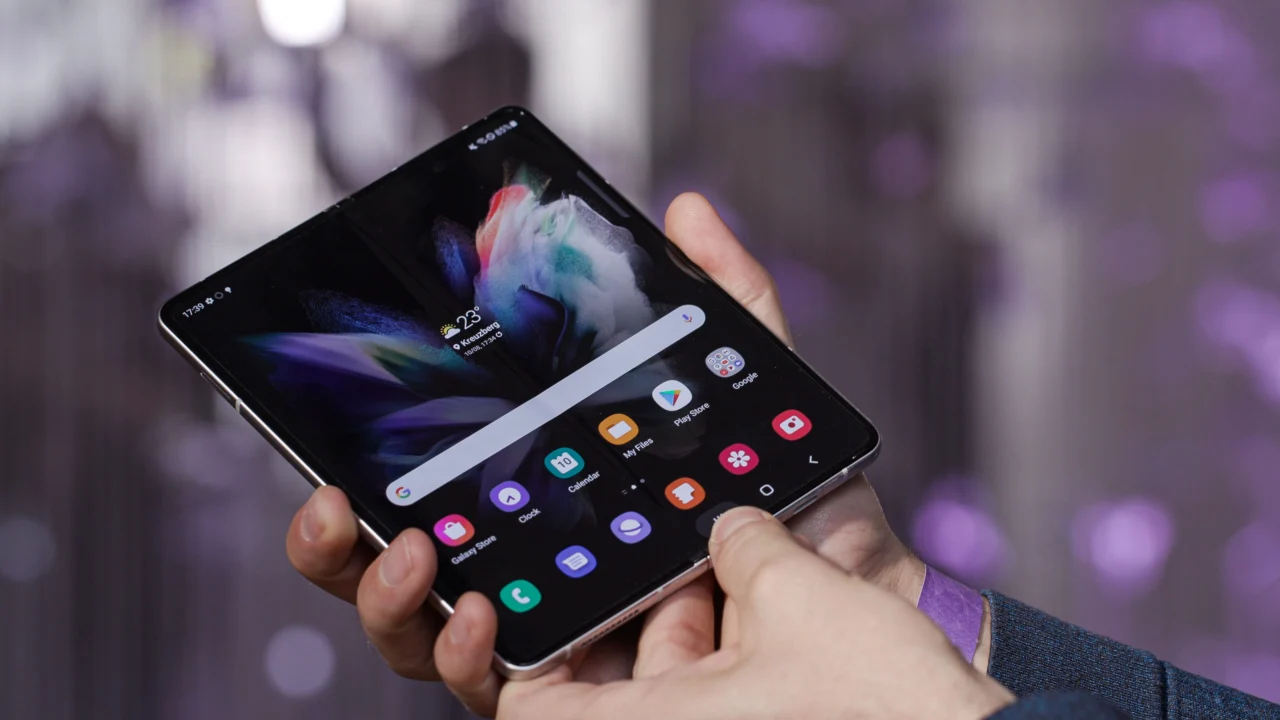
The Galaxy Fold 4 is most powerful smartphone this year of Samsung. It is powered by Qualcomm Snapdragon 8 Gen+ 1 SoC, boots on Android 12 with One UI and have a 5 cameras – Triple rear camera setup on back, one is folded screen and another on is unfolded.

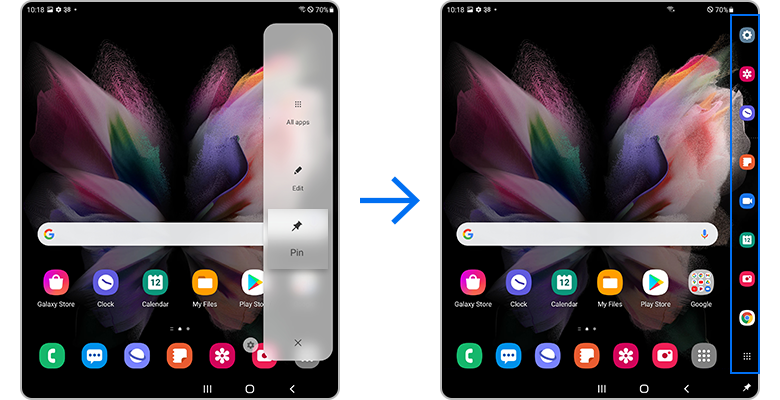
The Galaxy Fold 4 5G is already well-known for its multitasking feature, which allows you to select what to focus on when you’re doing multiple tasks at once and has configurable split-screen capabilities. The Samsung multi-window experience has become more adaptable to fully utilise the big main screens on the Galaxy Fold 4 5G, and Taskbar pinning makes it quicker and simpler to access your favourite apps and layouts.

Galaxy Fold 4 Split Screen:

The Multi window feature on your Galaxy Fold 4 can help you multitask like a pro throughout the day. If you want to watch a video while looking through photos, or send emails while browsing the news, simply open the apps at the same time using split screen or pop-up view. Three apps can be used at once on your Fold 4. The Multi window tray can be customized to include your most-used apps, so you’ll always have everything you need. Check out a whole new level of multitasking on the Galaxy Fold 4 5G below.

How to use split screen on Galaxy Z Fold 4

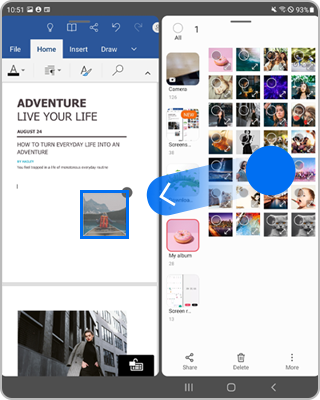
  1. From the screen’s right side, swipe left to open the Multi window tray.
  2. On the Fold4, tap the grid icon.
  3. To open an app in split screen view on the Fold4, drag and drop it to the left or right of the screen and then do the same for additional apps if desired.
  4. To open an app in pop-up view, just drag the app to the center.
  5. You can also tap Recents, tap an app’s icon, and then tap either Open in split screen view or Open in pop-up view.

Multi window with Edge panel:

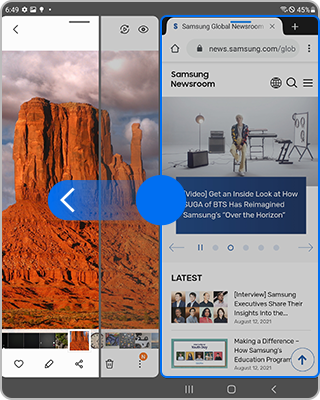
Multi window lets you run up to three apps at the same time in the split screen view. You can also run multiple apps at the same time in the pop-up view.

The Edge panel feature allows you to quickly switch between frequently used apps while using apps on the large screen. By pinning it, you can keep the Taskbar on the screen, so can access your favorite apps and layouts quickly and easily.
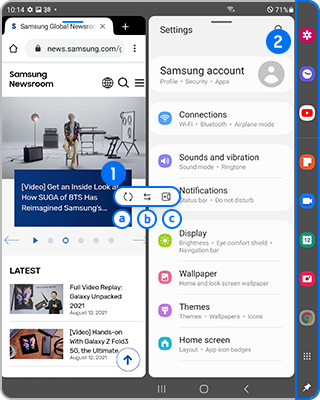
DividerTaskbar
ⓐ Rotate clockwise
ⓑ Switch window
ⓒ Add app combo to Edge panel
You can pin the Taskbar to the left or right of the screen and add frequently used apps to the Taskbar to launch them together in the split screen view with a single tap.

To pin your favorite apps in the Edge panel, follow the steps below.

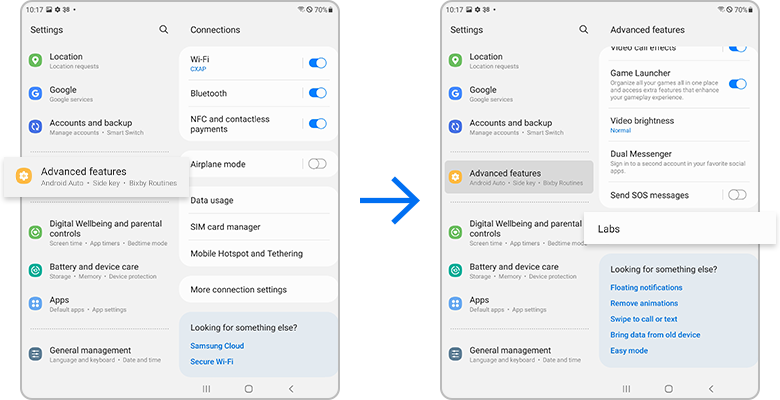
Step 1. Open Settings, and then select Advanced features.

Step 2. Select Labs.

Step 3. Tap the switch to activate Pin your favorite apps.

Step 4. Drag the Edge panel handle towards the center of the screen, and then tap the More options icon.

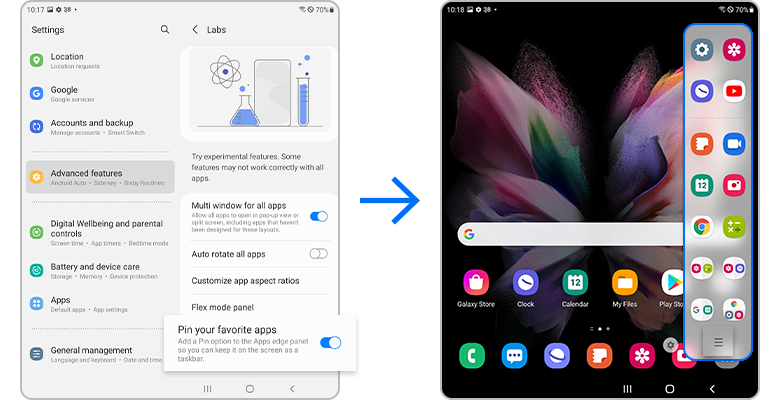
Step 5. Select the Pin icon.

Step 6. You will see the pinned favorite apps on your Taskbar.
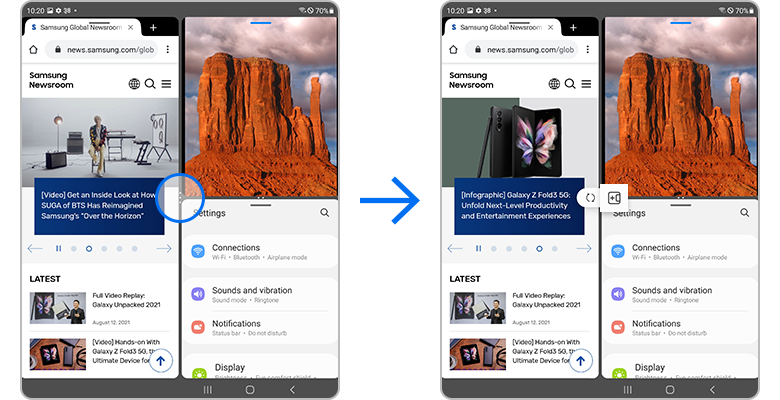
Adding app pairs:

You can add frequently used apps to the Edge panel to launch them together in the split screen view with a single tap.

Step 1. In the split screen view, tap the circles between the app windows.

Step 2. Tap the Add app combo to Edge panel icon, then the apps you are using in the split screen view will be saved on the Edge panel as an app pair.

Versatile multi-window experience:

Compared to the previous Galaxy Foldable device, improvements have been made to enable more freedom and smoother transitions.

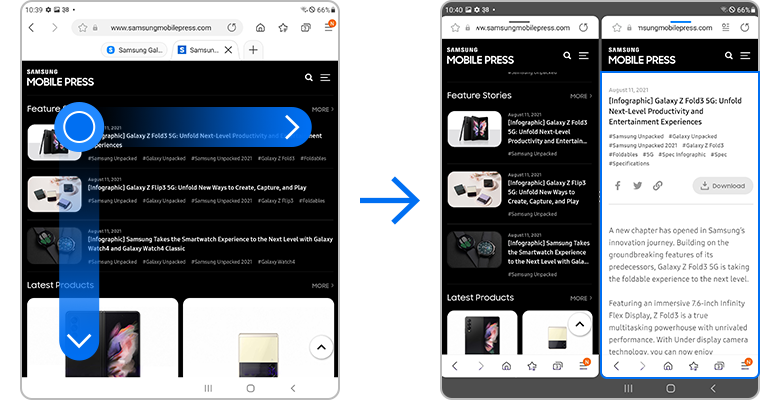
Drag & Split: You can quickly open content in another window and creates divisions directly from the content.

Resizable windows: You can resize the window with a single touch.

Easy window transitions: You can change the positions of the windows with a single touch.

File drag & drop: You can share content between different apps.


Harsh is a seasoned technology enthusiast with a deep passion for Android. Since its announcement in 2007, he has closely followed the evolution of this operating system, gaining a comprehensive understanding of its features and capabilities. His background in Android, IT, and Journalism has equipped him with the skills to analyze and present complex technological concepts in a clear and engaging manner. As the Editor-in-Chief at Samlover.com, Harsh is dedicated to sharing his knowledge and experiences about Android, services, and applications with the world.

Guide

Samsung One UI: How to Enable Swipe-Down Search On Galaxy Phone’s Home Screen

Published

on


Nowadays, every smartphone user generally uses hundreds of applications on their devices, and due to the large number of applications, it’s a bit difficult to find the desired application, so to make it simple, users have only one solution: manually search for the application with its name using the finder option.

Samsung Swipe Down To Access App Finder

Samsung has rolled out a new update for the Home Up application. With the latest update, users have received some useful features; Finder Access is one of them, which has made app access more convenient. It allows users to quickly jump to the app finder with one swipe. Let’s understand how you can use it.

How to Enable Samsung Home Screen App Finder with Good Lock Home Up

To use the App Finder, your Samsung Galaxy phone should support the Good Lock application and then you need to update the Home Up application to the latest version (v15.0.01.19), then follow the below steps:

  1. Go to the Good lock.
  2. Here, select the Home Up module.
  3. Turn on the Home Up
  4. Then tap on the Home screen option.
  5. Here, you will get the Finder access option, then tap on it. 
  6. Now choose any option from the “Home screen” or “App screen” where the feature should be activated.
  7. Now if you swipe down on the Home Screen to access App Finder.


Note: The latest update for Home Up is only available for Galaxy devices that are running on One UI 6.1 or above. And Swipe Down control centre won’t work after enable this feature.


Continue Reading

Guide

Galaxy AI: How to Summarize & Transcribe Voice Recording into Text on Samsung Phone

Published

on


Samsung has recently rolled out the One UI 6.1 update for several Galaxy devices. With the late One UI update, the company has brought several innovations that will provide several utility options for the users. From several features, the AI power ones are the most highlighted, and voice record summarization is also a unique feature.

What is voice recording summarization?

Now, with the One UI 6.1 update, Galaxy users can easily transcribe any voice recording into text form and summarize it in their own language. This will help users easily make notes according to what is recorded. 

To use this feature, you need to go to the settings and then select the Advanced feature. Here you will see the voice recorder, tap on it, and then touch the summaries option. Now turn it on. When it is turned on, you can enjoy summarizing voice recordings.

To summarize the voice recording Go to the recorder application, select the desired recording file, and here you will see the option ‘transcribe’. Once it finishes transcribing, you will see one more tab for summarization. However, the option is currently not working correctly as it fails to detect the exact wording of other languages except English. However, it is expected that the company may bring more optimization to the device to make the feature more powerful.

How to Transcribe Voice Recording into Text on Samsung Phones

If you are using a Galaxy device that has installed the One UI 6.1 update, then you can easily use voice recorder summarization by following these steps:

  1. Go to the Settings and select the advanced feature.
  2. Here you will see a voice recorder option. Tap on it to access
  3. Now turn the toggle on to activate it.
  1. Once activated, open the voice recorder, then select any saved file.
  2. Now you will see the option “transcribe.”  It will provide all the information from the test. 
  3. Once the transcription is done, you will get a summarize tab adjacent to it; just swipe write to access it. 

Continue Reading

Guide

Samsung One UI: How to Manage Always-on Display (AOD) Brightness after One UI 6.1

Published

on


Samsung has introduced some new utilities with One UI 6.1 for the AOD display. Users who own the Galaxy S24 can put wallpaper in the Always on display and add some widgets as well; however, the company has removed the manual brightness settings for the same feature. But you don’t have to worry, as you can still manage the always-on-display brightness with new methods. 

How to manage AOD brightness for Galaxy S24 series

With the latest One UI 6.1, Samsung has removed the manual brightness settings for the Galaxy S24 devices. If you want to adjust the auto brightness, you have to set the preferred brightness level of the main display from the notification panel. The reason behind the removal of the feature is to give convenience to users, as it brings automation for brightness by default, so it will dim or increase the brightness of the AOD according to the light condition. 

How to Manage AOD Brightness after One UI 6.1 update 

Apart from Galaxy S24 devices, Samsung has placed the AOD manual control option in the Good Lock – LockStar App settings, so if you want to take advantage of the manual control settings, first you need to update the Lockstar application to the latest version, then follow the below steps:

  1. Open the Good Lock on your device’
  2. Then tap on the LockStar module from the list of “Makeup” modules.
  3. Here you will see the option  Always On Display Auto Brightness. 
  4. If you don’t see the manual brightness control, then turn the auto brightness off.
  5. Then you will get a dedicated slider so you can set the brightness to a different level.

Continue Reading