Connect with us

Guide

How To Use The S Pen on Galaxy Z Fold 4

Published

on


Want to learn the Galaxy Z Fold 4’s S Pen feature – The Galaxy Fold 4 is powered by Qualcomm Snapdragon 8 Gen+ 1 SoC, boots on Android 12L with One UI 4.1.1 and have a 5 cameras – Triple rear camera setup on back, one is folded screen and another on is unfolded.

As you can see, it is therefore once again a true premium smartphone that maintains some of the most appreciated features of previous generations, such as a huge internal screen that makes it compete with the tablet world, support for the S Pen, waterproofing, wireless charging support and the camera under the front display.

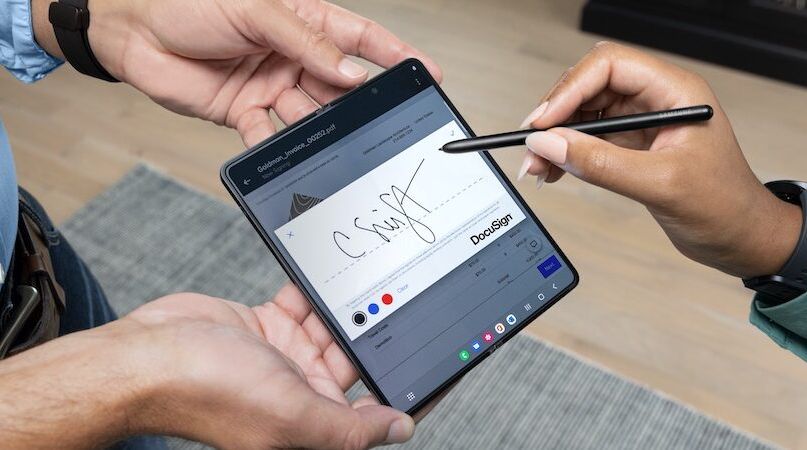
One of the most exciting features of Samsung’s new Galaxy Z Fold4 is its compatibility with the S Pen, particularly for company owners hoping to increase productivity. With the optional S Pen Fold Edition or Bluetooth-enabled S Pen Pro, you can pair your Galaxy Z Fold4 to unlock new possibilities and operate precisely on the smooth, sizable 7.6-inch internal screen.

If you already use an S Pen as an essential part of your workday, you’ll love what it can accomplish on Galaxy Z Fold 4. If you haven’t used an S Pen before, prepare to rewrite your definition of efficiency.

How To Take Notes instantly with Galaxy Z Fold 4’s S Pen

You could need to take notes at any time, not just in a meeting but also while you’re driving, lounging, or simply speaking. You don’t even need to unlock your Galaxy Z Fold4 to start taking notes with the S Pen.

  • Just press the side button on the pen and start writing.
  • Then, when you’re done, tap Save and everything will be safely stored in Samsung Notes.
  • You can also launch Samsung Notes at any time from the Air Command menu (see Tip below).

Galaxy Z Fold 4: How Use Air Command With S Pen

Air Command is a hub for one-tap S Pen shortcuts. With your Galaxy Z Fold4 in tablet mode, tap the floating pen icon on the right side of your screen to access the Air Command toolbar. From Air Command, you can create a new note, write on the screen, translate text, magnify on-screen content, draw on top of live video and more.

One of the most effective Air Command tools is Smart Select, which enables you to select on-screen items by circling it with a rectangle or other shape. The content can then be moved to another app, annotated, text extracted, and rapidly shared with colleagues. Smart Select is a helpful time-saver if you frequently create business proposals and presentations.

How To Translate Text With S Pen On Galaxy Z Fold 4

With the S Pen, conducting business globally is a little bit simpler. You may rapidly translate words, emails, documents, and news articles across dozens of languages with the Translate option in the Air Command menu.

  • Simply open the text you want to translate
  • Then launch Translate in the Air Command menu.
  • Select the source and target languages, and just hover over the text.
  • You can switch between translating a single word and a full sentence by tapping the “T” in the Translate toolbar.
  • To hear the word or phrase spoken, tap the speaker icon while you hover.

Galaxy Z Fold 4: How to Take notes during a video conference with S Pen

You can hold a video conference hands-free when you flex the Galaxy Z Fold4 and place it on your desk. However, what if you also want to take notes? You can use the Samsung Notes app to run on the bottom half of your screen simultaneously because Multi-Active Windows functionality is available.

  • Just swipe in the tab on the right of your screen to open the Edge Panel or access the new taskbar at the bottom of the display when you’re working in an app.
  • Then find Samsung Notes (if you don’t see it, tap the menu at the bottom of the Edge Panel or on the side of the taskbar and select “All apps” to add it), and drag and drop a Notes window to the bottom half of your screen.

Having a mobile videoconferencing suite in your pocket is refreshingly convenient for a business leader on the go. Rather than carrying a pad of paper and an ink pen, you have your Galaxy Z Fold4 and S Pen ready to let you connect, listen closely and take notes.


Harsh is a seasoned technology enthusiast with a deep passion for Android. Since its announcement in 2007, he has closely followed the evolution of this operating system, gaining a comprehensive understanding of its features and capabilities. His background in Android, IT, and Journalism has equipped him with the skills to analyze and present complex technological concepts in a clear and engaging manner. As the Editor-in-Chief at Samlover.com, Harsh is dedicated to sharing his knowledge and experiences about Android, services, and applications with the world.

Guide

Samsung One UI: How to Enable Swipe-Down Search On Galaxy Phone’s Home Screen

Published

on


Nowadays, every smartphone user generally uses hundreds of applications on their devices, and due to the large number of applications, it’s a bit difficult to find the desired application, so to make it simple, users have only one solution: manually search for the application with its name using the finder option.

Samsung Swipe Down To Access App Finder

Samsung has rolled out a new update for the Home Up application. With the latest update, users have received some useful features; Finder Access is one of them, which has made app access more convenient. It allows users to quickly jump to the app finder with one swipe. Let’s understand how you can use it.

How to Enable Samsung Home Screen App Finder with Good Lock Home Up

To use the App Finder, your Samsung Galaxy phone should support the Good Lock application and then you need to update the Home Up application to the latest version (v15.0.01.19), then follow the below steps:

  1. Go to the Good lock.
  2. Here, select the Home Up module.
  3. Turn on the Home Up
  4. Then tap on the Home screen option.
  5. Here, you will get the Finder access option, then tap on it. 
  6. Now choose any option from the “Home screen” or “App screen” where the feature should be activated.
  7. Now if you swipe down on the Home Screen to access App Finder.


Note: The latest update for Home Up is only available for Galaxy devices that are running on One UI 6.1 or above. And Swipe Down control centre won’t work after enable this feature.


Continue Reading

Guide

Galaxy AI: How to Summarize & Transcribe Voice Recording into Text on Samsung Phone

Published

on


Samsung has recently rolled out the One UI 6.1 update for several Galaxy devices. With the late One UI update, the company has brought several innovations that will provide several utility options for the users. From several features, the AI power ones are the most highlighted, and voice record summarization is also a unique feature.

What is voice recording summarization?

Now, with the One UI 6.1 update, Galaxy users can easily transcribe any voice recording into text form and summarize it in their own language. This will help users easily make notes according to what is recorded. 

To use this feature, you need to go to the settings and then select the Advanced feature. Here you will see the voice recorder, tap on it, and then touch the summaries option. Now turn it on. When it is turned on, you can enjoy summarizing voice recordings.

To summarize the voice recording Go to the recorder application, select the desired recording file, and here you will see the option ‘transcribe’. Once it finishes transcribing, you will see one more tab for summarization. However, the option is currently not working correctly as it fails to detect the exact wording of other languages except English. However, it is expected that the company may bring more optimization to the device to make the feature more powerful.

How to Transcribe Voice Recording into Text on Samsung Phones

If you are using a Galaxy device that has installed the One UI 6.1 update, then you can easily use voice recorder summarization by following these steps:

  1. Go to the Settings and select the advanced feature.
  2. Here you will see a voice recorder option. Tap on it to access
  3. Now turn the toggle on to activate it.
  1. Once activated, open the voice recorder, then select any saved file.
  2. Now you will see the option “transcribe.”  It will provide all the information from the test. 
  3. Once the transcription is done, you will get a summarize tab adjacent to it; just swipe write to access it. 

Continue Reading

Guide

Samsung One UI: How to Manage Always-on Display (AOD) Brightness after One UI 6.1

Published

on


Samsung has introduced some new utilities with One UI 6.1 for the AOD display. Users who own the Galaxy S24 can put wallpaper in the Always on display and add some widgets as well; however, the company has removed the manual brightness settings for the same feature. But you don’t have to worry, as you can still manage the always-on-display brightness with new methods. 

How to manage AOD brightness for Galaxy S24 series

With the latest One UI 6.1, Samsung has removed the manual brightness settings for the Galaxy S24 devices. If you want to adjust the auto brightness, you have to set the preferred brightness level of the main display from the notification panel. The reason behind the removal of the feature is to give convenience to users, as it brings automation for brightness by default, so it will dim or increase the brightness of the AOD according to the light condition. 

How to Manage AOD Brightness after One UI 6.1 update 

Apart from Galaxy S24 devices, Samsung has placed the AOD manual control option in the Good Lock – LockStar App settings, so if you want to take advantage of the manual control settings, first you need to update the Lockstar application to the latest version, then follow the below steps:

  1. Open the Good Lock on your device’
  2. Then tap on the LockStar module from the list of “Makeup” modules.
  3. Here you will see the option  Always On Display Auto Brightness. 
  4. If you don’t see the manual brightness control, then turn the auto brightness off.
  5. Then you will get a dedicated slider so you can set the brightness to a different level.

Continue Reading